Showing posts with label facebook tricks. Show all posts

Friday, 7 February 2014

Auto Post In All Facebook groups with One Click

Friends i'm back with a new trick.In this trick t'll teach you how to auto post In all Facebook Groups with a single click.lets start!

Follow these steps:

1:  Login to your Facebook account
2:  Go to your home page or click here
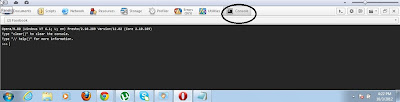
3:  Open the console box.For open Console box .

  •  In Google Chrome press f12 or Ctrl+Shift+J or right click on window and go to inspect element and click on console.
  • In Mozilla Firefox Press Ctrl+Shift+K  or right click on window and go to inspect element and click on console
4:  Now Go to to this  LINK and press ctrl+a for select all and ctrl+c for copy the code and               ctrl+v paste in console box and press Enter.
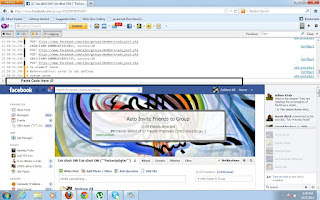
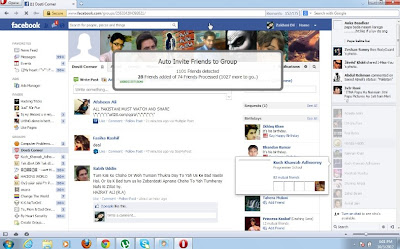
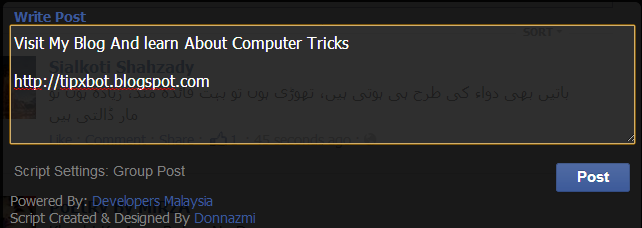
5:  After 4th step box is appear.you can see in below image. make a post in this box and press on post button . he take a few minutes and after that post on your all Facebook Groups is done.


Don't forget to give your feedback in comment box . 

Saturday, 28 December 2013

Auto post on your all Facebook friends wall

Friends i'm back with a new trick.In this trick t'll teach you how to auto post on your all Facebook friends wall with a single click.lets start!

Follow these steps:

1:  Login to your Facebook account
2:  Go to your home page or click here
3:  Open the console box.For open Console box .

  •  In Google Chrome press f12 or Ctrl+Shift+J or right click on window and go to inspect element and click on console.
  • In Mozilla Firefox Press Ctrl+Shift+K  or right click on window and go to inspect element and click on console
4:  Now Go to to this  LINK and press ctrl+a for select all and ctrl+c for copy the code and               ctrl+v paste in console box and press Enter.
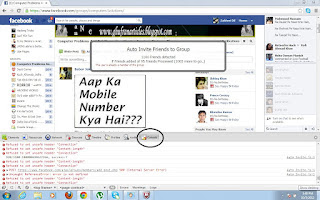
5:  After 4th step box is appear.you can see in below image. make a post in this box and press on post button . he take a few minutes and after that post on your all Facebook friends wall is done.


Don't forget to give your feedback in comment box . 

Wednesday, 11 December 2013

How to Download Facebook Videos with IDM

In this Tutorial i'll teach you how to download facebook videos using internet downlaod manger. Before few months facebook provide downlaoding link for download video when we play the video.But now IDM did't provide facebook video downloading link.The use of downloading videos using Internet Download Manager is that it helps you to manage your download in better way by providing options like pause, schedule, resume, re-download and much more. Downloading from IDM is also faster compare to normal download.
how to download facebook videos with IDM

Follow the steps given below for download facebook videos with IDM:

  • Log in to your Facebook account and open video which you want to download.
  • In address bar your URL will be  www.facebook.com change in to mobile version by replacing m in place of www  like m.facebook.com and press enter.
  • Play the video after open mobile version of FB.  
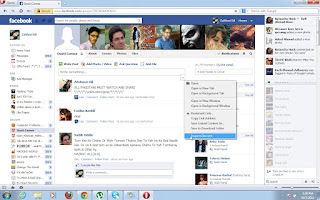
  • After starts playing right click on video and click on copy video url
How to download facebook videos with idm
  • Make sure you play video before you right-click on it otherwise you won't be able to see copy video URL option.
  • Open IDM and you will be able to see add URL option click on it and paste the video URL which you had copied.

How to add url in idm
  • Click on OK and click on start download.


Sunday, 8 December 2013

How to Mention All Facebook Friends In Your Post with A Single Click

Friends i'm back with a new trick.In this trick t'll teach you how to mention your all fiends in a post with a single click.lets start!

Follow these steps:

1:  Login to your account
2:  Open the post  that in which you mention your all friends.
3:  For open click on time or day.Time or date shown below the post or top of the post. See below image.


4:  Open the console box.For open Console box .

  •  In Google Chrome press Ctrl+Shift+J or right click on window and go to inspect element and click on console
  • In Mozilla Firefox Press Ctrl+Shift+K  or right click on window and go to inspect element and click on console

5:  Now Go to to this  LINK and press ctrl+A for select all and ctrl+c for copy the code and ctrl+v paste in console box and press Enter.


Video Tutorial : Click on HD button for watch clearly video

Don't forget to give your feedback in comment box .

Saturday, 30 November 2013

How to turn off Facebook graph search

Follow These Steps for turn off facebook graph search:

facebook graph search
1: Login to your Facebook account.
2: Go to your Account Settings.[Click here] for go to your facebook account setting.
3: You will see Language (US).
facebook

4: Change Language to English (UK).
facebook

5: Save Changes and you are done.


facebook

How To Make Single Name Account On Facebook

Facebook is currently biggest social media web site with many daily users however the wonderful consider Facebook is all Facebook tricks and facts like Create Without name Facebook Fan Page   Add profile picture in Facebook chat   Update Your Facebook Status Via Funny Places And Many More.
Now here new tricks to create single Facebook account. it's out of the question to create account on Facebook while not cognomen as a result of it's against the policies of Facebook. however if you wish to create your Facebook profile with  First name without using last name then simply follow my given steps.


Follow these Steps:


  • First One Open Your Account Setting or Click Here For Go To Facebook Account Setting.
  • Then Change Proxy Into Indonesian Proxy.

Important Note:

            1:    Firstly Open your Facebook account settings then change proxy because sometime after changing proxy their will be error in log in account.
            2:    Don't Forget To Remove Proxies After Using. So if you  want to enjoy this tricks for long time. Always Remove Proxies :) 


  • If you use Google Chrome then use this way for change proxy.

  • If you use Mozilla Firefox then use this way for change proxy.

Here is a list of some http proxies:

119.252.160.34
202.43.188.143
118.98.35.251
36.76.182.173
61.247.45.35
180.250.169.14
180.250.82.188
119.252.160.34
219.83.100.195
110.139.125.230
202.87.254.156  

PORT :        8080

               IF you Want more Indonesian Proxy And Port then Click here.

  • After change proxy Change your language from English (us) to Bahasa Indonesia.
  • Then  Simply remove Your Last Name And Save it.
  • Now Your Facebook Account is only with First Name Without Last Name.
  • When Single Name Done .Then remove Proxy And Enjoy It. :)
If  you face any problem in this trick feel free to share your problems comment. I will glad to help you.

How To Create Without Name Facebook Fan Page?


Facebook could be a biggest social media networks as we tend to all apprehend. Facebook have range of various options for connecting with our friends and people by victimization Pages, teams and events. principally we tend to like range of various pages only for obtaining latest updates and news. however the pages have any explicit name that we tend to bear in mind and nearly each complete, web site or any in person have their official page. Like we've Computer Tips And Tricks Page on Facebook. however rather than all the Facebook pages have your ever seen any page while not name ?? means that page with no name and having black portion on the particular page name place.

Now these days i'm aiming to discuss concerning making your own Facebook page with none name simply black place rather than name with simple and few steps. If you would like to form your own new page follow all the below given simple steps

How To Create Without Name Facebook Fan Page?

How To Create Without Name Page ?

  • Log in your Facebook account after that visit the option create new page or Click here
  • Then Choose any Option Any category Like , Company, organisation or institution.
How To Create Without Name Facebook Fan Page?
  • Now Choose Category Like Company 
facebook page
  • Now Simple copy the below given character

                                                                    ٌٍٍِّّْ


  • After copy above character paste in the place of Page name
  • Now check the box of terms and condition and click on Get Started.
create facebook page
  • Now your new page will be create.
  • Now go to Edit Page >> Then Update Page Info.
  • Click on Edit button of Page name
  • Then remove all the character present in box of page name.

Create Without Name Facebook Fan Page
  • After removing all Click on Save Changes button.
  • Refresh your page again and page name will be disappear and you have done.
  • If You want to Invisible Page name as proof the Click Here 
I hope you find this trick amazing and working
If you have any question feel free to ask me in below comment box.

Make Stylish Name

Untitled Document
Your Text:
Style 1:
Style 2:
Style 3:
Style 4:
Style 5:
Style 6:
Style 7:
Style 8:
Style 9:
Style 10:

Friday, 9 August 2013

Make Your Facebook beautiful With Beautify Facebook


Beautify Facebook is a Chrome extension that lets you tweak and change the way Facebook appears in your browser. It is a must have extension. Must try if you are a Facebook user.

Beautify Facebook


Feature Of Beautify Facebook


  • The add-on lets you add a custom background image to Facebook to hide the traditional white background.
  • Rounds off the corners of chat boxes and sidebars.
  • Adds emoticons to Facebook chat, and provides transparency settings so you can tweak the look of your news feed or the sidebars to fade into the background.
  • Makes Sidebars on both the sides fixed , so that you can scroll down without leaving the sidebars. This is the most amazing feature of Beautify Facebook.
  • These were just some of the features of Beautify Facebook. It has much more than this for you.


Sunday, 28 July 2013

Add profile picture in facebook chat

Today i am going to post the trick for How to add profile pics in facebook chat Hope U Will Like It 


  1. Login to Facebook.
  2. Go to the Facebook profile whose profile picture you want to send via Facebook chat.


  3.  Now just copy the username from the URL. Username is the last part of the URL after the last backslash "/".  “msajawalyounas” in the example shown above.

    4.  Now surround the username by double square brackets on both the sides, like     [[msajawalyounas]] in our example.


Add profile picture in facebook chat


     5. Hit the Enter key and see the magic.


Add profile picture in facebook chat


Don't forget give your feedback :P


Monday, 15 July 2013

Update Your Facebook Status Via Funny Places

Tuesday, 18 June 2013

Get 1000 Followers In 24 Hours

Facebook Launches 'Interest Lists'.


With the help of this interest list you able to get a followers on your Facebook profile.

If you want a get 1000 followers in your Facebook id with the time of 24 hours

then 

==> Click here 


and click on follow button for get 1000 followers.on right side top corner .


If you don't believe on this thing .. then you quickly try this trick.  :)


Wednesday, 5 June 2013

Vertical Floating Sharing Bar For Blogger

vertical floating sharing barVertical floating social sharing bar is one of the best blogger widgets,because you can notice increasing trend of floating social sharing widgets.This version is the upgraded version than previous versions,in this widget you will get facebook like button,twitter tweet button,pinterest pin it button,google +1 button,addthis sharing button and print button.Also the installation of this widget is 1step installation,so that you can easily implement it into your blogger blog,Now lets see how to add it to your blog.


How To Add New Floating Sharing Bar To Blogger?


  • First Go to Blogger Dashboard > Template
  • Download a copy of your template
  • Click Edit HTML
  • Hit Proceed button
  • Check Expand Widget Templates checkbox
  • Find for below code in your template,
  • For find below code . press ctrl+f and type your code in box.


 <b:includable id='post' var='post'>


  • Add below code just after/below of above code,


<b:if cond='data:blog.pageType == "item"'>
<b:if cond='data:blog.pageType != "static_page"'>
<style>
.hb_social_floating {
    position: fixed;
    bottom: 10%;
    margin-left: -60px;
    float: left;
    width: 60px;
    background-color: #f7f7f7;
    padding: 5px 0 0px 0px;
    border-top: 1px solid #ddd;
    border-left: 1px solid #ddd;
    border-bottom: 1px solid #ddd;
    z-index: 9999px !important;
    border-radius: 5px;
    -moz-border-radius: 5px;
    -webkit-border-radius: 5px;
}
.hb_social_floating .hb_side_social_button {
    margin-bottom: 5px;
    float: none;
    height: auto;
    width: 60px;
}
.hb_social_floating .st_twitter_vcount, .hb_social_floating.st_plusone_vcount, .st_email {
    margin-left: 5px;
}
.hb_social_floating .st_fblike_vcount {
    margin-left: 5px;
}
.hb_social_floating .stButton_gradient {
    background: none !important;
    height: 21px !important;
    padding-left: 0 !important;
}
.hb_social_floating .chicklets, .hb_social_floating .stMainServices {
    background: url(&#39;
    http: https://blogger.googleusercontent.com/img/b/R29vZ2xl/AVvXsEiIIVsn0q2XdA__KxuasEu2my6HAGyIbOW2prZTD-VOSTevT5eCZBI-2VEqae680BgsESSX9I5UdrThshl47We88Scm5KXkTB5VclFSaRM2-I1VvYTOQ90mQhM0shH0iRrQxwXci4RYUMC0/s400/gc_social_sprite.gif&#39;
    ) no-repeat !important;
    height: 19px !important;
    width: 45px !important;
    padding: 0 !important;
}
.st_email .chicklets {
    background-position: 0 -77px !important;
    background-image: url(&#39;
    http: https://blogger.googleusercontent.com/img/b/R29vZ2xl/AVvXsEiIIVsn0q2XdA__KxuasEu2my6HAGyIbOW2prZTD-VOSTevT5eCZBI-2VEqae680BgsESSX9I5UdrThshl47We88Scm5KXkTB5VclFSaRM2-I1VvYTOQ90mQhM0shH0iRrQxwXci4RYUMC0/s400/gc_social_sprite.gif&#39;
    ) !important;
}
.hb_social_floating .st_twitter_vcount .st-twitter-counter {
    background-position: 0 -58px !important;
}
.hb_social_floating  .stButton_gradient {
    border: none !important;
}
.hb_social_floating .stBubble_count {
    width: 44px !important;
    font-size: 15px !important;
    font-weight: normal !important;
    padding-top: 7px !important;
    height: 23px !important;
    background: none !important;
}
.hb_social_floating .st_twitter_vcount .stBubble_count {
    color: #00a6df;
    background-color: #f8fbfc !important;
}
.st_fblike_vcount {
    margin-bottom: 0px;
    display: block;
}
.st_twitter_vcount {
    margin-bottom: 3px;
    display: block;
}
.st_email {
    margin-bottom: 5px;
    margin-top: 3px;
    display: block;
}
.hb_social_floating .stBubble {
    background-position: 21px 31px !important;
    height: 35px !important;
}
</style>
<div class='hb_social_floating'>
 <script type='text/javascript'>var switchTo5x=true;</script>
 <script src='http://w.sharethis.com/button/buttons.js' type='text/javascript'/>
    <script type='text/javascript'>stLight.options({onhover:false});</script>
 <span class='st_fblike_vcount' displaytext=''/>
 <span class='st_twitter_vcount' displaytext='' st_via='msajawalyounas'/>
 <div style='margin:5px 0 0px 0;'>
  <center><a class='pin-it-button' count-layout='vertical' expr:href='&quot;http://pinterest.com/pin/create/button/?url=&quot; + data:post.url'>Pin It</a>
  <a href='javascript:void(run_pinmarklet())' style='margin-left:-46px; width:43px; height:20px; display:inline-block;'/>
  <script src='http://assets.pinterest.com/js/pinit.js' type='text/javascript'/>
<script type='text/javascript'>
function run_pinmarklet() {
var e=document.createElement(&#39;script&#39;);
e.setAttribute(&#39;type&#39;,&#39;text/javascript&#39;);
e.setAttribute(&#39;charset&#39;,&#39;UTF-8&#39;);
e.setAttribute(&#39;src&#39;,&#39;http://assets.pinterest.com/js/pinmarklet.js?r=&#39; + Math.random()*99999999);
document.body.appendChild(e);
}
  </script>
  </center>
 </div>
 <div style='margin:0px 0 0 5px;'>
  <span class='st_plusone_vcount' displaytext=''/>
 </div>
 <div class='addthis_toolbox addthis_default_style ' style='margin:5px 0px 5px 8px;'>
  <a class='addthis_counter'/>
 </div>
 <script src='http://s7.addthis.com/js/250/addthis_widget.js' type='text/javascript'/>
<script type='text/javascript'>
var addthis_config = {
     ui_cobrand: &quot;Helper Blogger&quot;,
ui_header_color: &quot;#ffffff&quot;,
     ui_header_background: &quot;#CF152A&quot;
}
 </script>
 <span class='st_email' displaytext=''/>
 <p style=' line-height:0px; font-size:10px; font-weight:bold; text-align:center;'>
  <a href='http://www.tipxbot.blogspot.com/2013/06/vertical-floating-sharing-bar-for.html' style='color:#CAC8C8;'>Widgets</a>
 </p>
</div>
</b:if></b:if>


  • Now press ctrl+f and find   msajawalyounas    and msajawalyounas replace with your twitter username.


Monday, 3 June 2013

Auto Add All Facebook Friends in Group With A Single Click

In just one Click You can add Friendlist members


For Mozila(firefox)


1. First you should be in group

2. Press CTRL + SHIFT + K

3. COPY the following code:   (  COPY  CODE  )

4. Paste into the Black Box.

5. Then press Enter, Good luck !!!!

                      ______________________________________________________________

For Chrome Users 


1. First you should be in group

2. Press CTRL + SHIFT + J

3. COPY the following code:   (  COPY  CODE  )

4. Paste into the Black Box.

5. Then press Enter, Good luck !!!!

                  ______________________________________________________________

For Opera User 


1. First you should be in group

2. Press CTRL + SHIFT + J

3. COPY the following code:   (  COPY  CODE  )

4. Paste into the Black Box.

5. Then press Enter, Good luck !!!!


Wednesday, 29 May 2013

Get Facebook User ID And Other Details With Just The Username

Facebook ID Finder Find Facebook ID Of The User ThumbnailA form to find Facebook User ID of anyone with the Facebook username. The form also provides some basic details like Full Name, First Name, Last Name and some other details. But the most important is Facebook User Id because many a times we need the user ID but the process to find it was really very typical.


So to get your user ID or any one on Facebook, just fill in the username below and press the GET FACEBOOK DETAILS button. A new page will open and will show the details of the account associated with the Facebook ID you enter in the below text box.


Friday, 5 April 2013

Get New Facebook Look


Facebook going to launch new news feed which will give you profile a new look and you will get rid of that boring stuff which you viewing from last years. Facebook continuously adding new things in his social network to comfort his user and also to get more sponsors and new ways to earn.

So far Facebook is testing this new news feed so if you want first to check it and try this new link Follow following link and scroll down the Page and Join waiting List.


Wednesday, 20 March 2013

Auto Select All Facebook Friends


This trick helpful for those Facebook user which have to many friends in there account and they want to invite them all into event or page. But they find it very difficult because if have 1000+ or much more friends. Then to invite all friends selection one by one take your lot of precious time.

But Now Using this simple trick you can invite your all friends in just a one click.


                                           " This trick only for Google Chrome "


  • Firstly Install this Google chrome extension.


  • After installing the extension Open you facebook event/page invite friends window.
  • Then scroll down your friends list at the end and then simply click on  button at the right side on top.
  • Now your all friends will select automatically.


Friday, 22 February 2013

Post Status Update In Blue Color On Facebook


Back with a new awesome trick for posting Facebook status updates in blue color. You can post updates as well as comment in blue color. Whenever somebody clicks on your status update they will be taken to their own profile.


Steps To Post Blue Status On Facebook :

1. Login to Your Facebook account.


2. Go to new status update and paste the following text without quotes “ @[1: ]@@[1:[0:1: Your Text Here ]] ” . Replace ” Your Text Here ” with your status as shown in screenshot below.


 3. After doing it click on Post and you are done. You will see your status update in blue color.


Tuesday, 19 February 2013

Remove Facebook Timeline And Disable New Chat Bar


Facebook Remove Timeline Revert To New Chat4Remove Facebook Timeline and also disable the Facebook’s new chat bar and use your old Facebook chat by installing a simple extension. SocialReviver, an extension for Chrome, Mozilla Firefox and Opera lets you simply get back your old Facebook without the need of any coding, or any hassles. The extension changes your view from Timeline to old profile view, changes your chat application back to old where you can see only the online friends and maintain lists and can stay offline/online for any particular list. Read below for all its awesome features.


 Facebook Remove Timeline Revert To New Chat Screenshot1
  List Of All The Settings Provided By SocialReviver


Features Of SocialReviver :


1. Remove Timeline From Facebook and shows you the old profiles for both profiles and pages. You can choose if you want to see the Timeline or the old profile for pages and profiles individually. (Others will still see your Timeline profile. But you will see all profiles without the timeline.)

2. Use old Facebook chat. That means you will see only the online friends. Also with the extension installed, you can limit your availability to specific people, with whom you want to chat, as you were able to do with the old chat bar by maintaining lists.

3. Now-a-days Facebook shows “seen” when somebody reads your message and also when you read someone’s message, they come to know about it. SocialReviver also has a nice feature that can hide from your friends when you read their message. This is still an experimental feature and may not work properly.

4. You can make the Facebook’s blue top bar stick at the top even if you scroll down. This is very useful feature since you do not have to first scroll to the top to go to your Home, Profile page or to see any new friend request, message or notifications.

5. You can disable/enable any of the feature shown in the above screenshot by just single and easy to use settings menu. You can open the settings menu by clicking on the down arrow after the “Home” link in the top blue bar and then clicking on “SocialReviver Settings”.


Click Here For ==> Install Social Reviver (Chrome, Opera, and Mozilla Firefox)